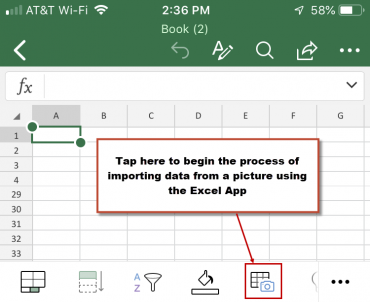
A Prerequisite, You Must Use the App!
Importing Your Data Into Excel is Easy!
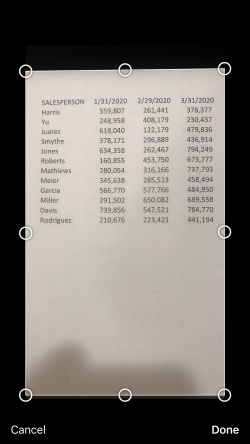
Using the camera, take a picture of your data, trying to focus as tightly on the data range as is possible. An illustration of the initial image taken by the camera is provided in Figure 2.
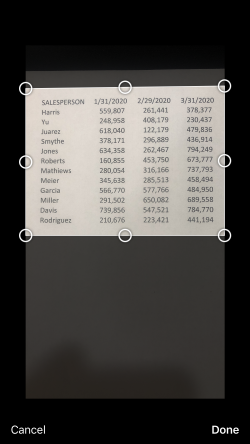
Next, crop the picture as tightly as possible by dragging the circles surrounding the image. The more closely you can crop the picture, the more accurate your data conversion will be and Figure 3 provides a sample of the cropped data.
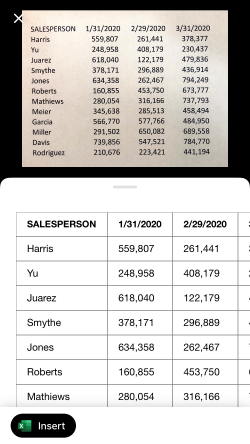
Immediately prior to converting the data into Excel, the app provides you with a preview that compares the initial image to how the data will appear in Excel. An example of this image is shown in Figure 4. To complete the process, just tap the Insert button in the lower, left corner of the app, as shown in Figure 4.
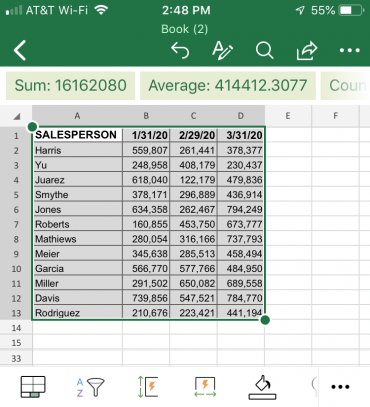
Finally, as you can see in Figure 5, Excel inserts the data into the spreadsheet. Once inserted, you can work with the data just as if you had manually entered it into the app. Of course, if you have a OneDrive, OneDrive for Business, or SharePoint Online account and you save the workbook there, you can then open the workbook – inclusive of the imported data – using your desktop version of Excel.

 RSS Feed